How-To: Beaded Star of David
How-To: Beaded Star of David
Did you know that you can create colorful beads by using Duck Tape®? Check out how we took a few Duck Tape beads and turned them into the Star of David for Hannukah!
Tutorial

Beginner
15 Minutes
Supplies & Tools
Scroll down for step-by-step directions.
Disclaimer - If the listed tape type is not available, there's no need to worry. All of our crafts can be adjusted to use whatever tape you have on hand!
Directions
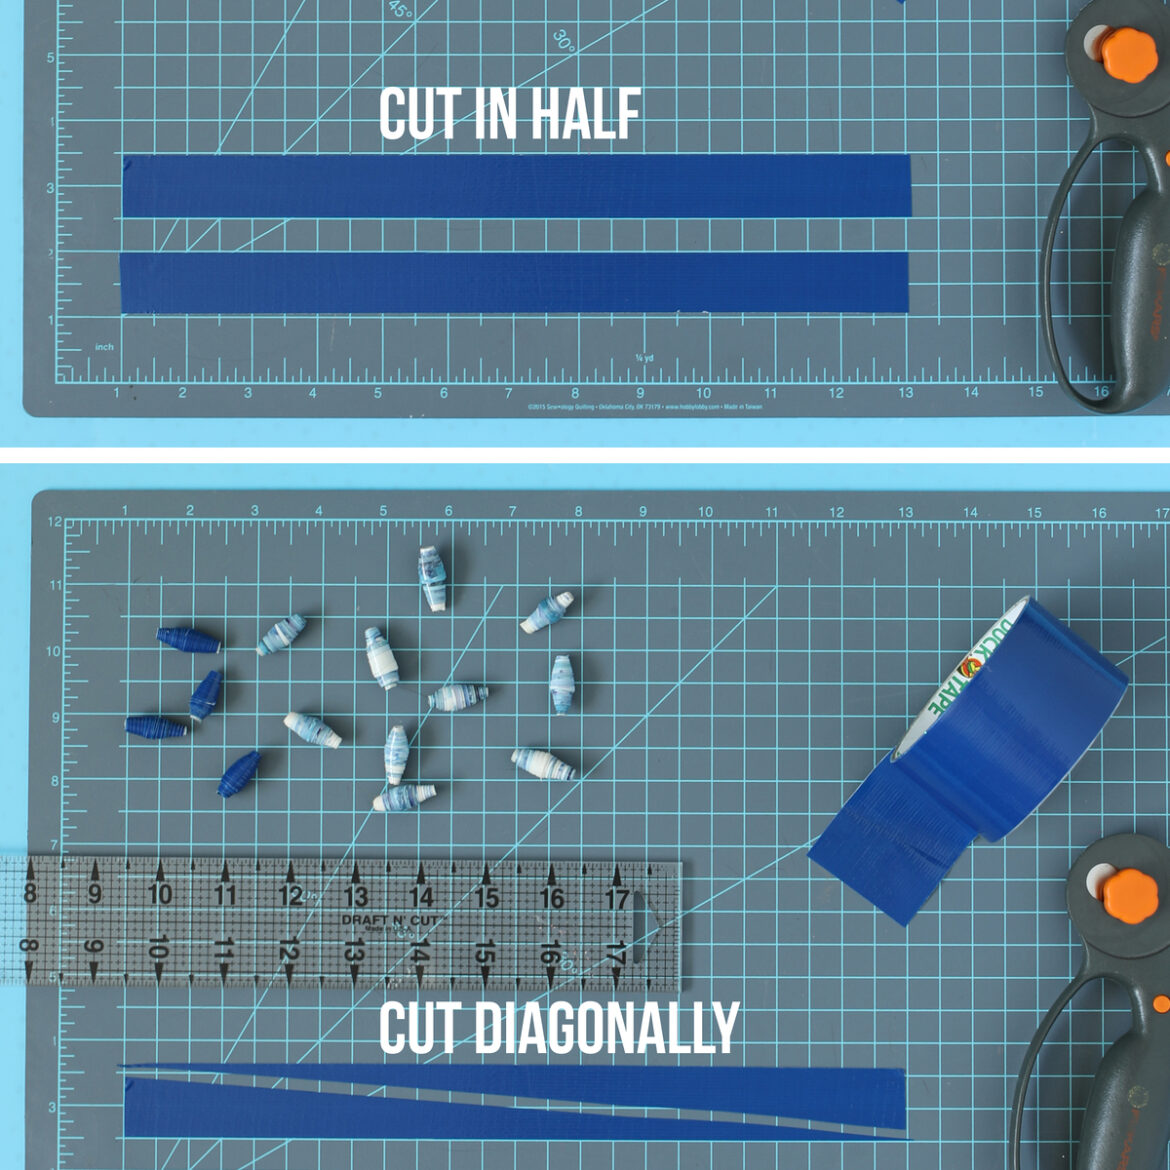
Step 1
To get started on making the Duck Tape® beads, measure and cut a 12 in. strip of tape. Then, cut that strip in half long ways so you have two pieces that are about 1 in. wide and 12 in. long.
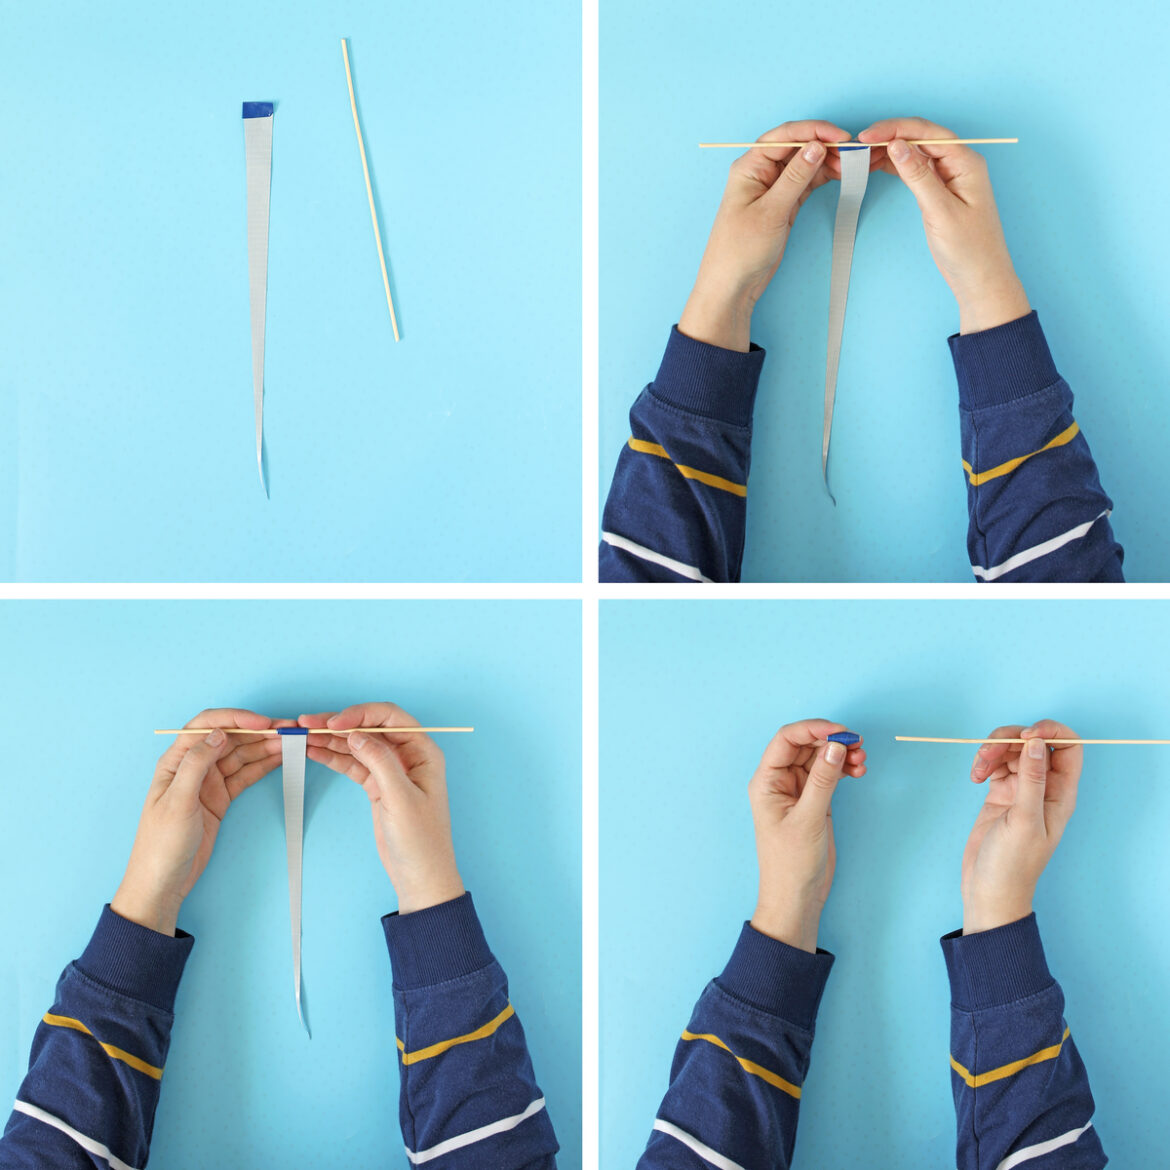
Step 2
Next, peel 1 triangle shape off the cutting mat and fold over about 1/2 inch of the larger end of the triangle. Then, wrap the folded larger end of the triangle around a small wooden skewer and keep rolling until all of the tape is rolled up on itself. Keep the tape centered on itself by making small adjustments as you roll so the shape stays symmetrical. Slide the Duck Tape® bead off the skewer and you're ready to make more beads!
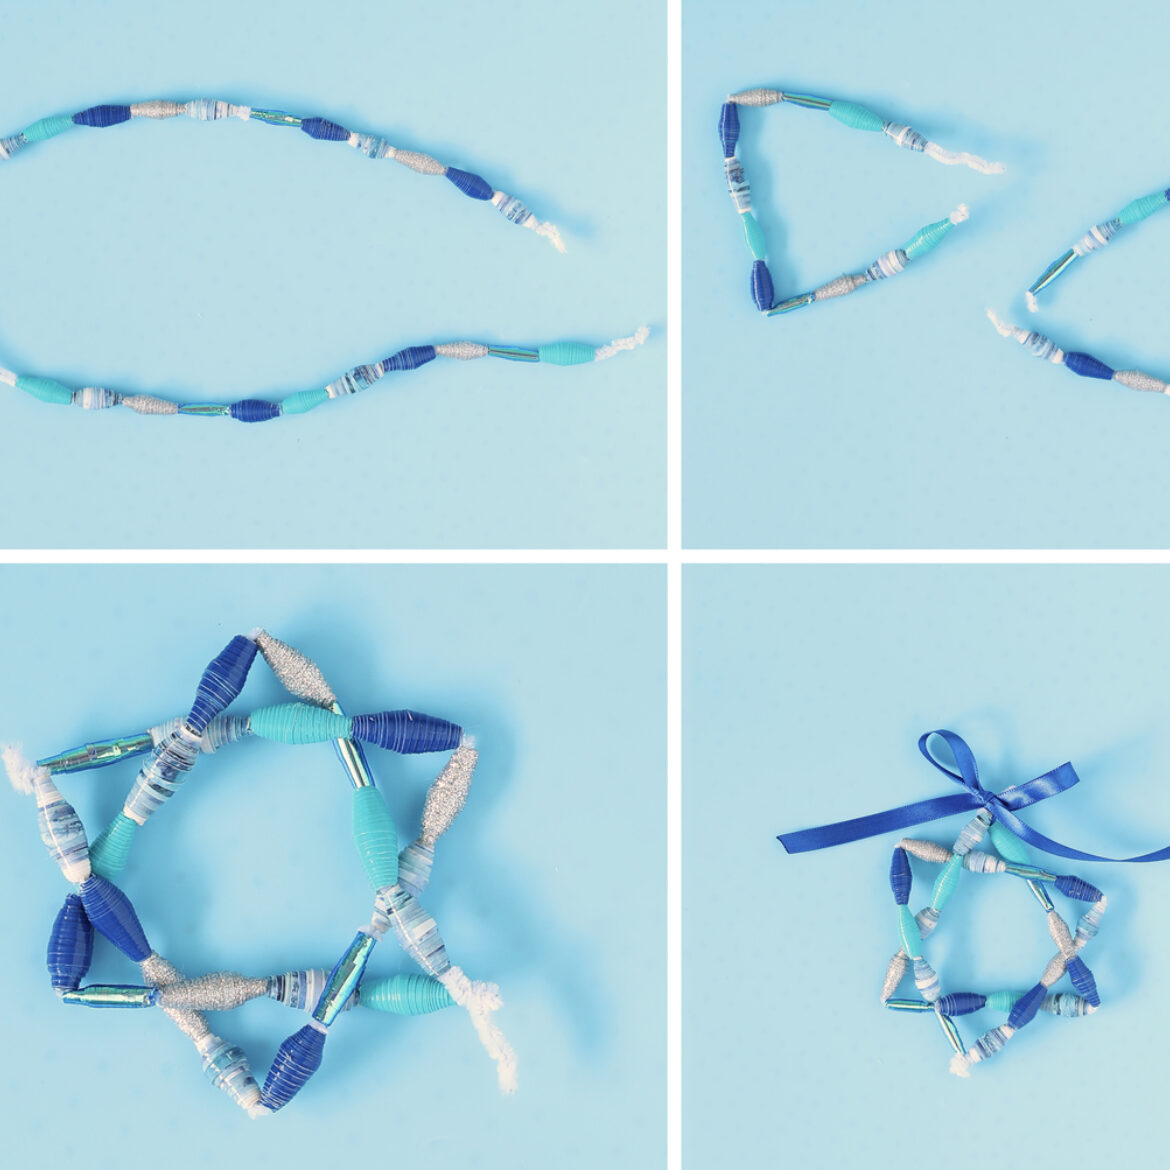
Step 3
Now onto making a beaded Star of David! First, slide 12 Duck Tape® beads onto a chenille stem. Repeat with a second stem so you have 2 strings of beads. Then, fold the stems into triangles with 4 beads on each side.

Step 4
Then, weave the 2 triangles together to form a Star of David. Each side of each triangle has to go over once and under once. Twist the open ends of the pipe cleaner together to close up the ends and hold everything together.
Finally, cut off any excess stem and you're all done!
