How-To: Duck Tape® Woven Baskets
How-To: Duck Tape® Woven Baskets
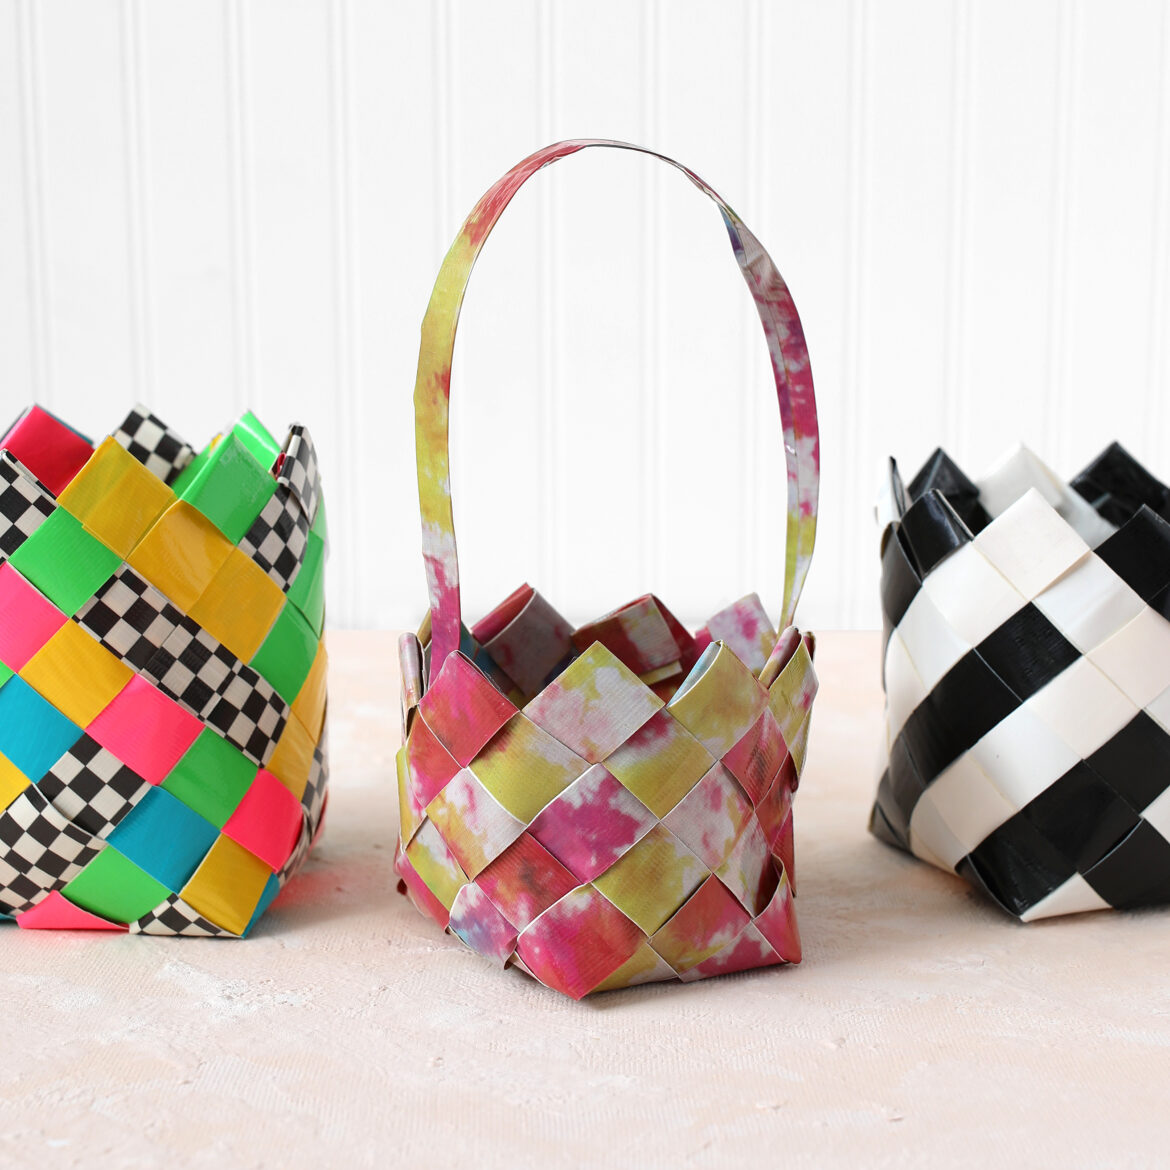
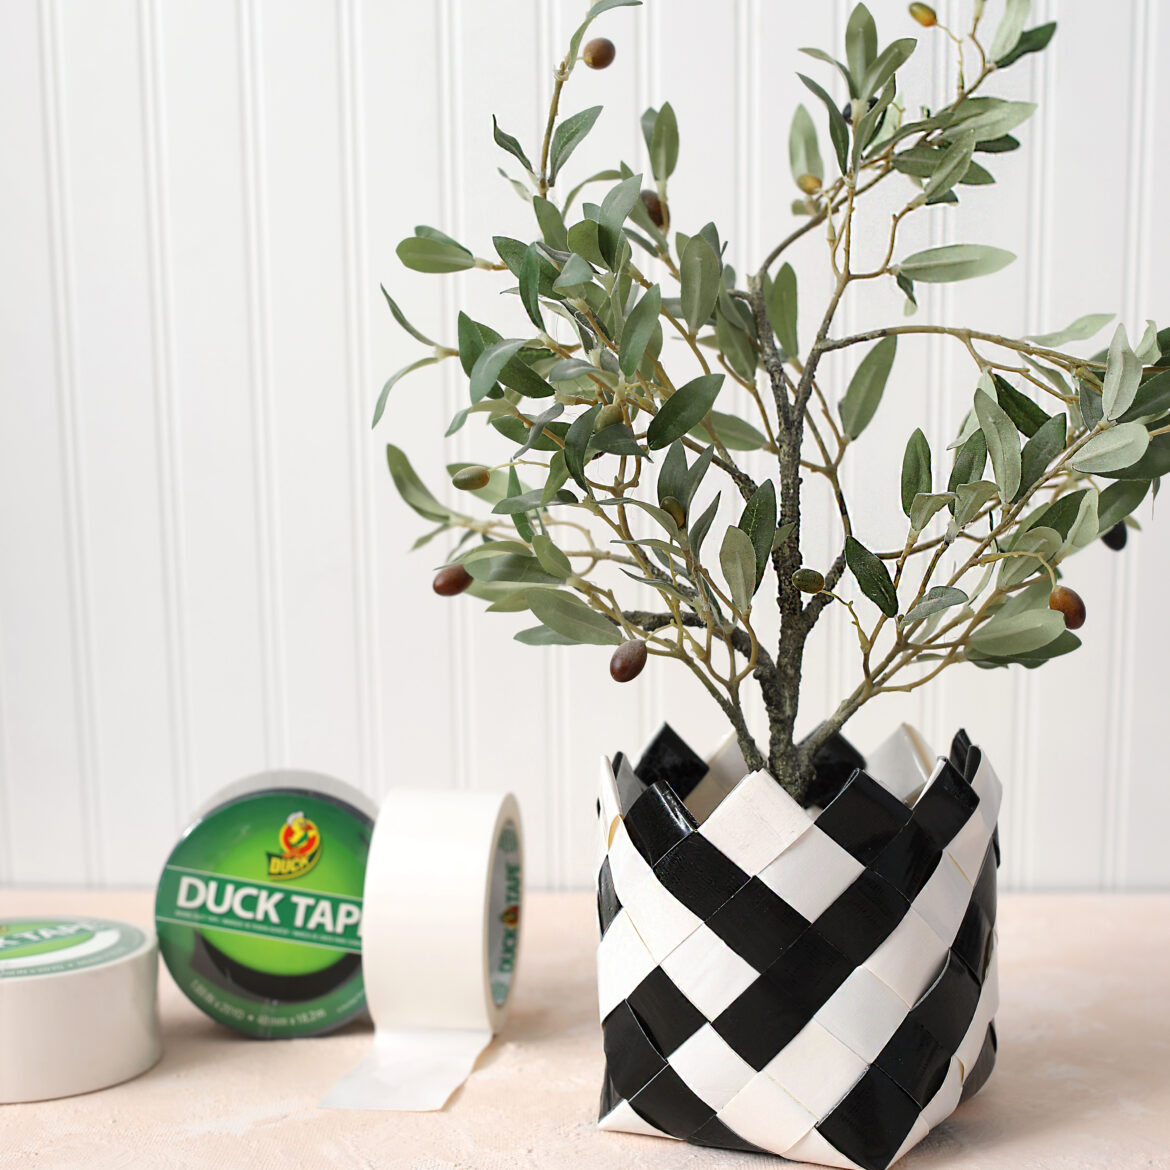
We partnered with The Craft Patch to create DIY woven baskets from Duck Tape® — whether you're making a basket for Easter, need a pop of color on your desk or a spot for your favorite plant, they're sure to be a hit.
Tutorial
Beginner
15 Minutes
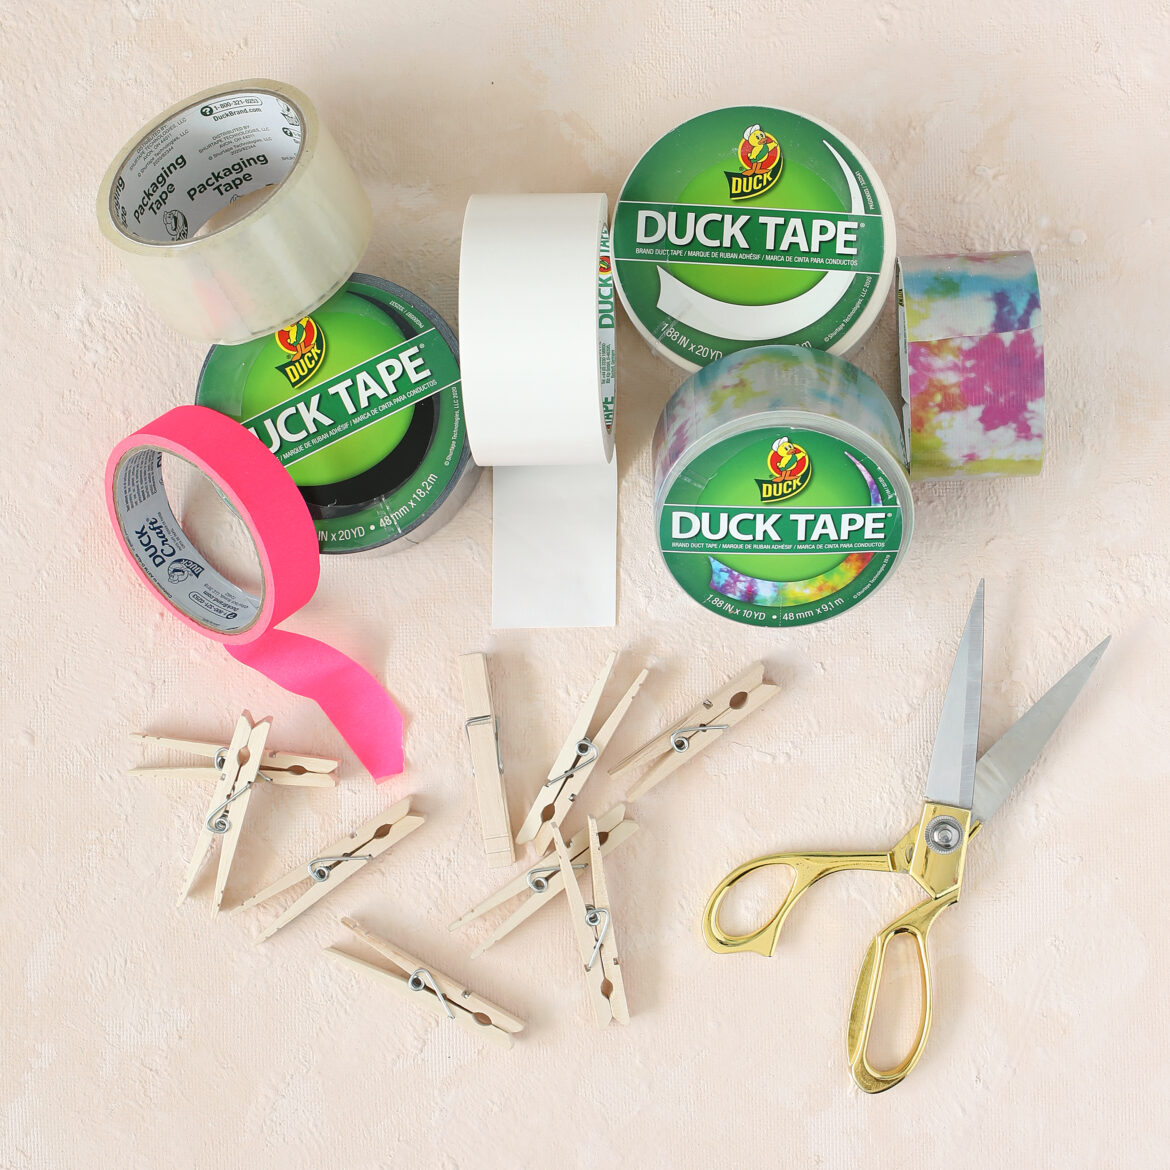
Supplies & Tools
Scroll down for step-by-step directions.
Disclaimer - If the listed tape type is not available, there's no need to worry. All of our crafts can be adjusted to use whatever tape you have on hand!
Directions
Step 1
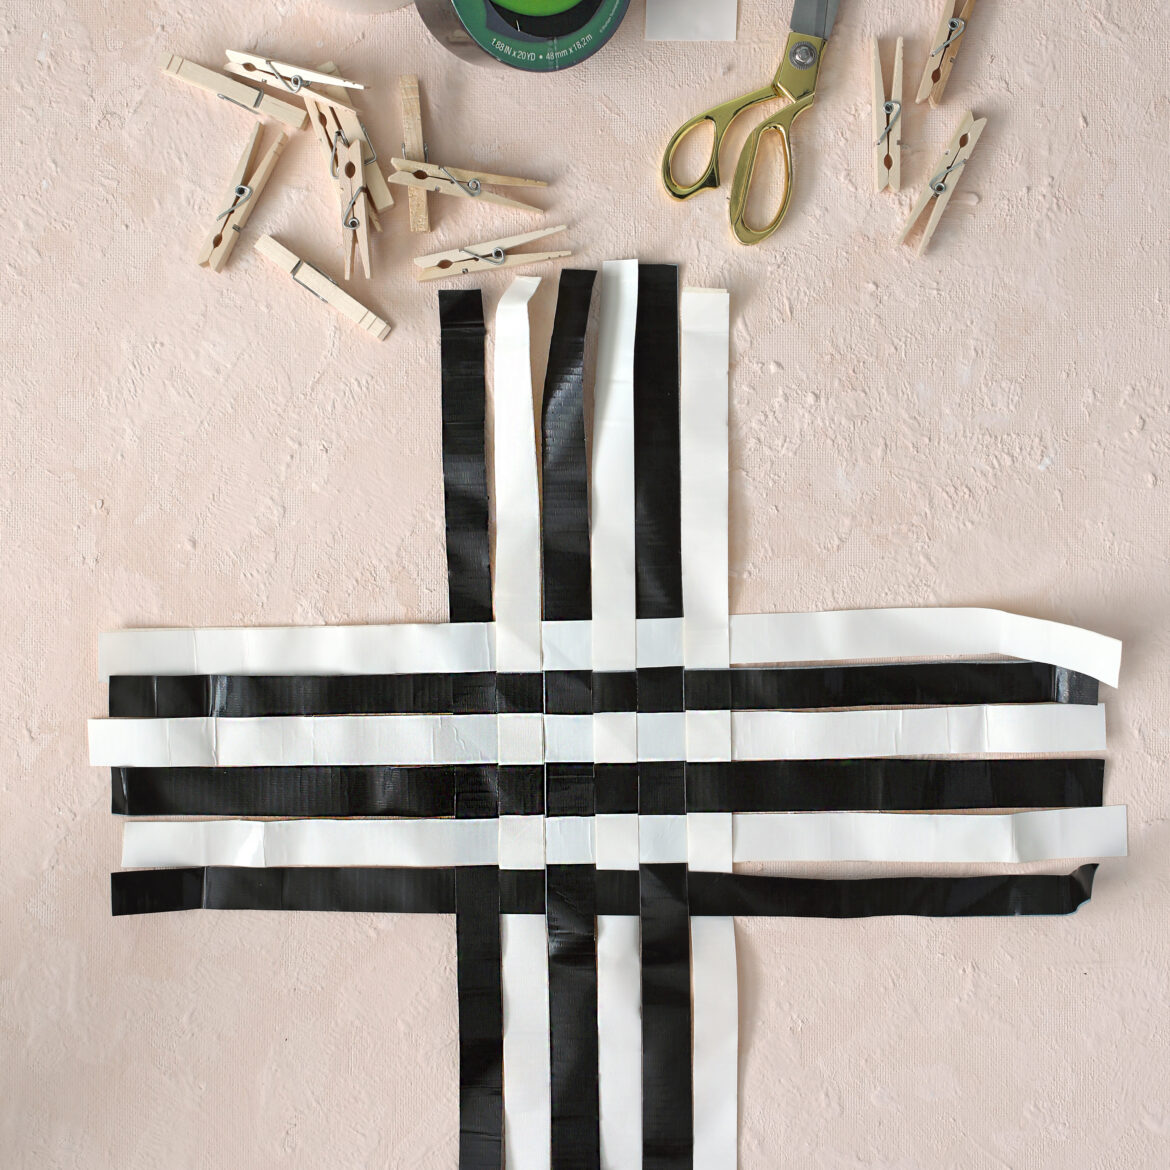
Cut two 21-in. long pieces of Duck Tape®. Stick those two pieces together, adhesive sides in. Then, cut those in half lengthwise so you have long, skinny strips. Repeat this step until you have 12 skinny strips total.
Step 2
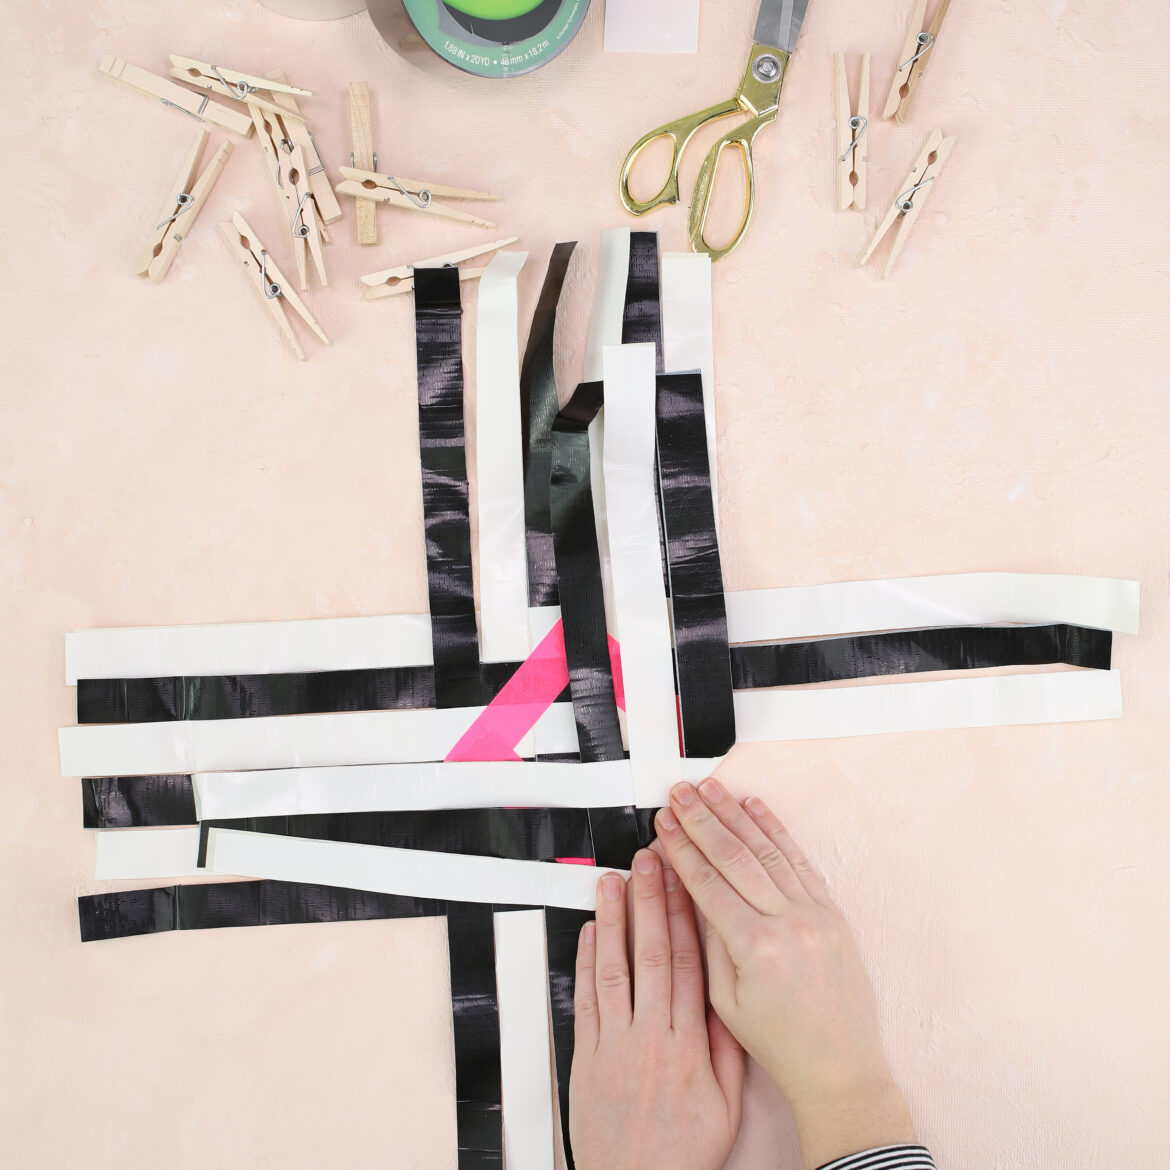
Lay six Duck Tape® strips strips down horizontally, then weave the remaining six strips through vertically.
Step 3
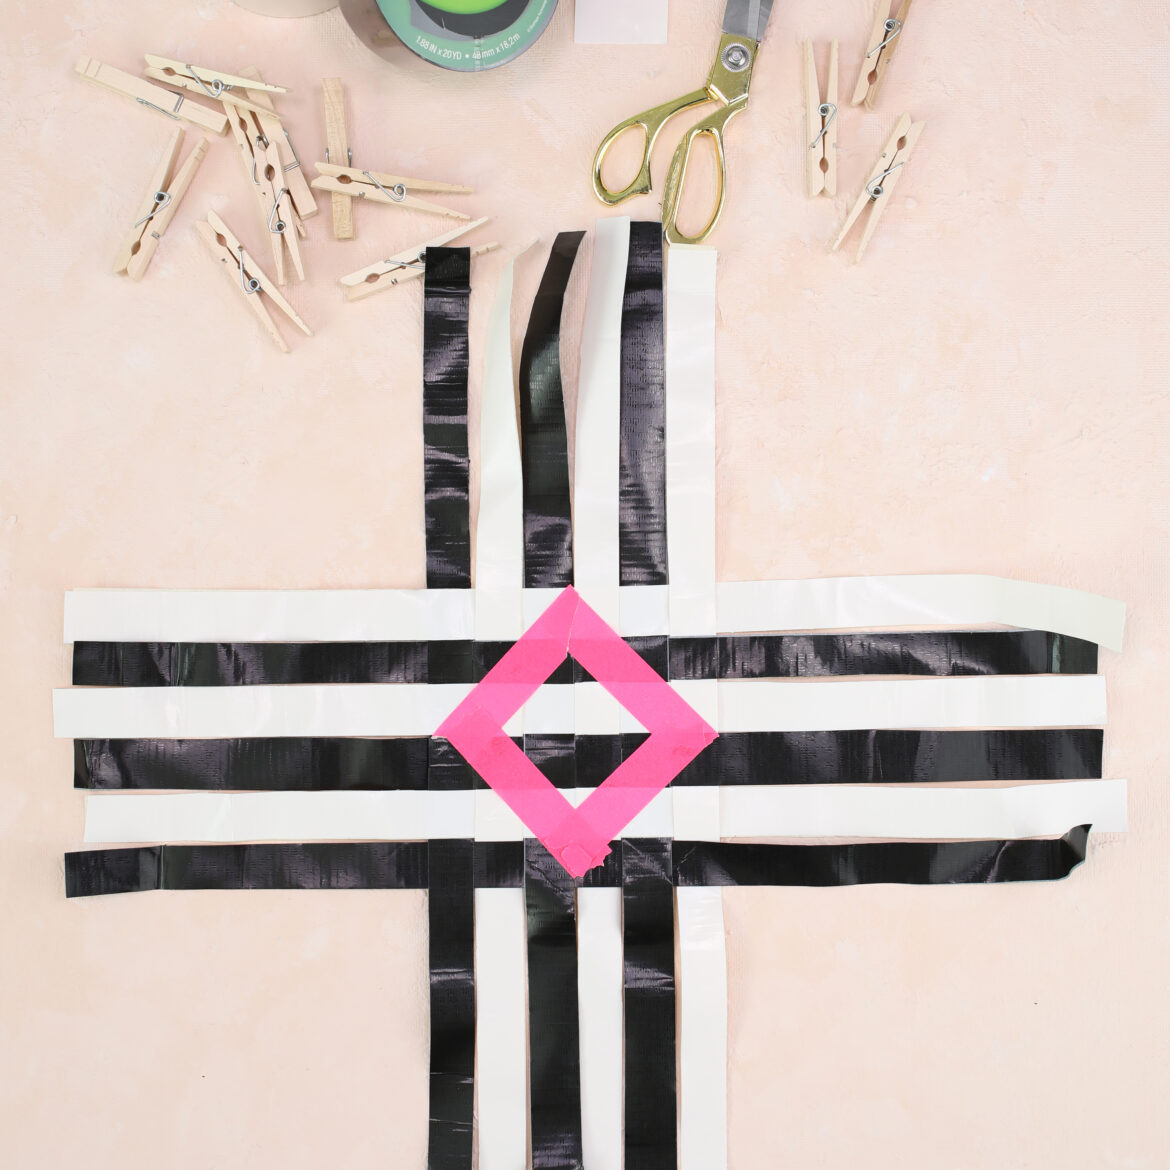
Push them tightly together, making sure all of the edges are even and the whole project is centered.
Step 4
Use masking tape to make a diamond shape in the center. Fold the strips inward along the edges of the diamond and make a good crease.
Step 5
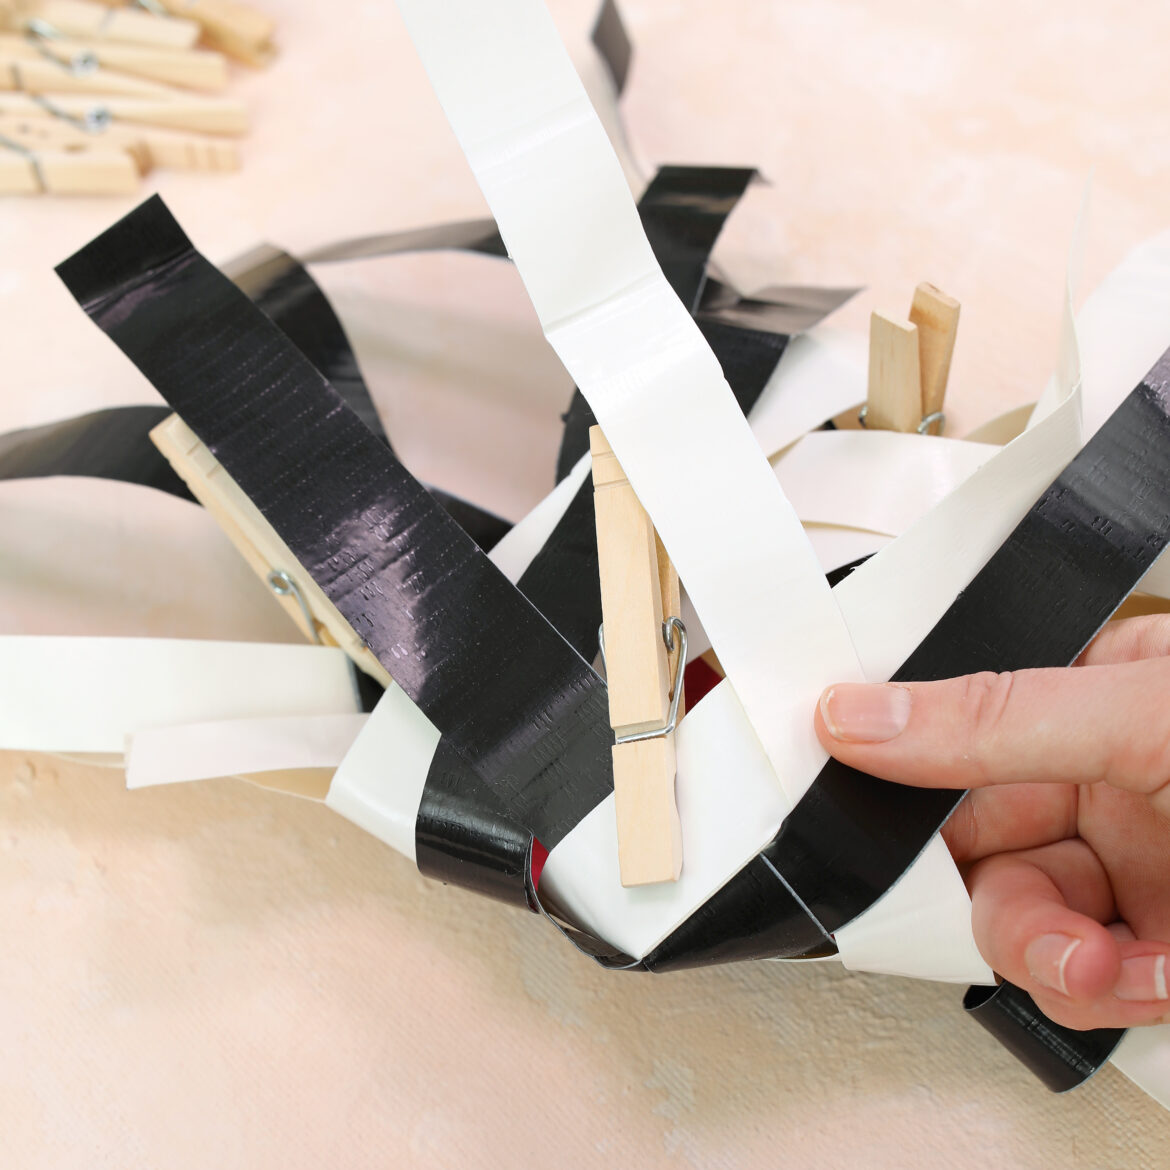
Find a corner of the diamond and fold the two adjacent strips together with the left strip on top of the right strip. Clip them together temporarily with a clothespin. Repeat for all four corners.
Step 6
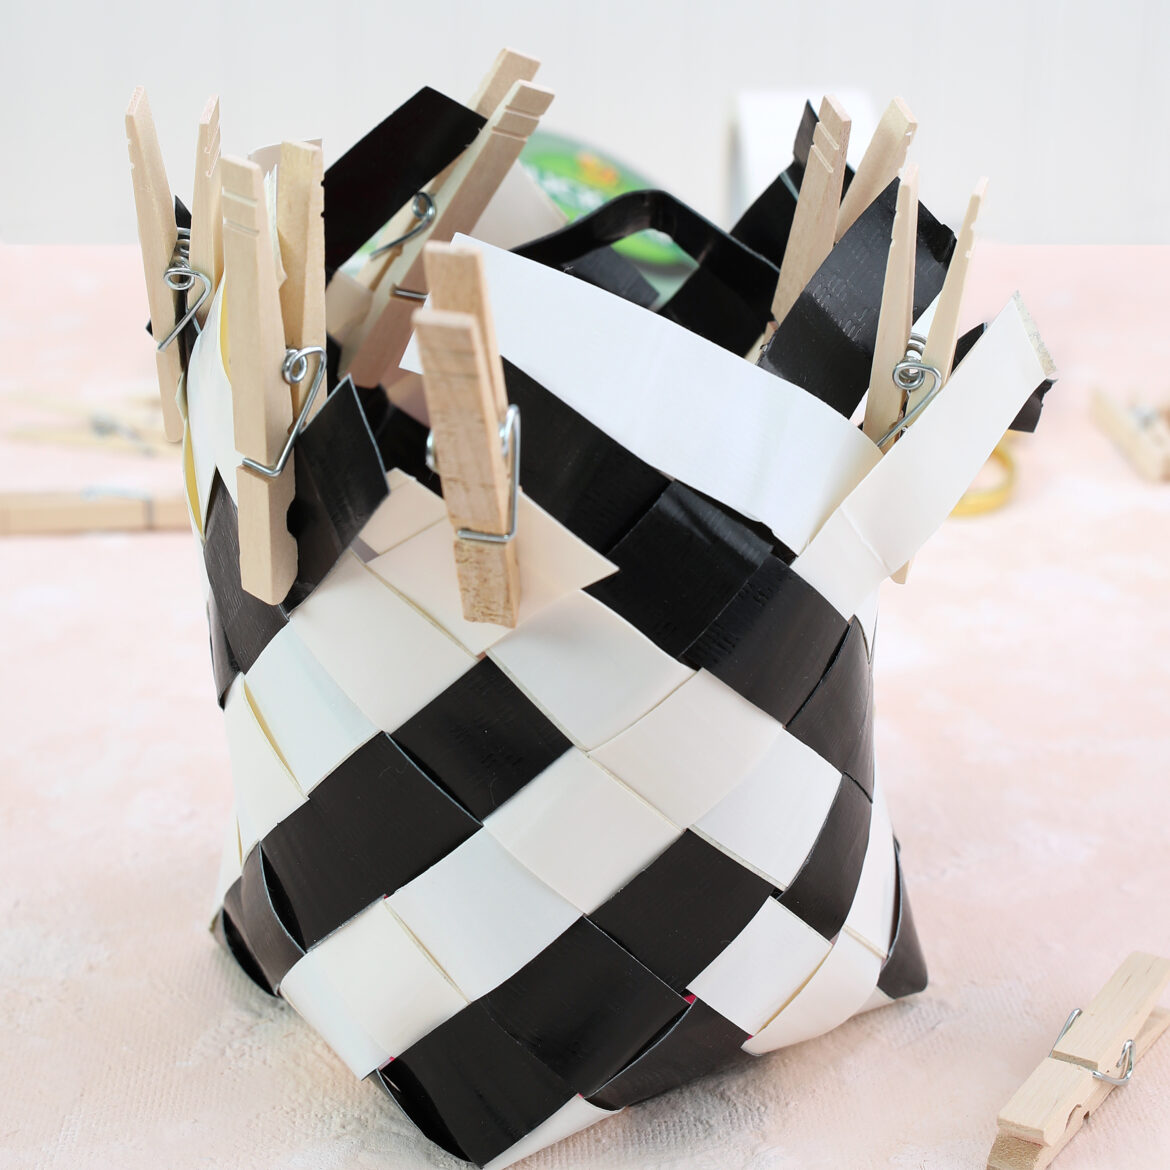
Now you can start weaving! Find the pieces that go next to each other and weave over, under, over, under until everything starts to come together. Clothespins will be your best friend through this part — they keep everything from unraveling.
Step 7
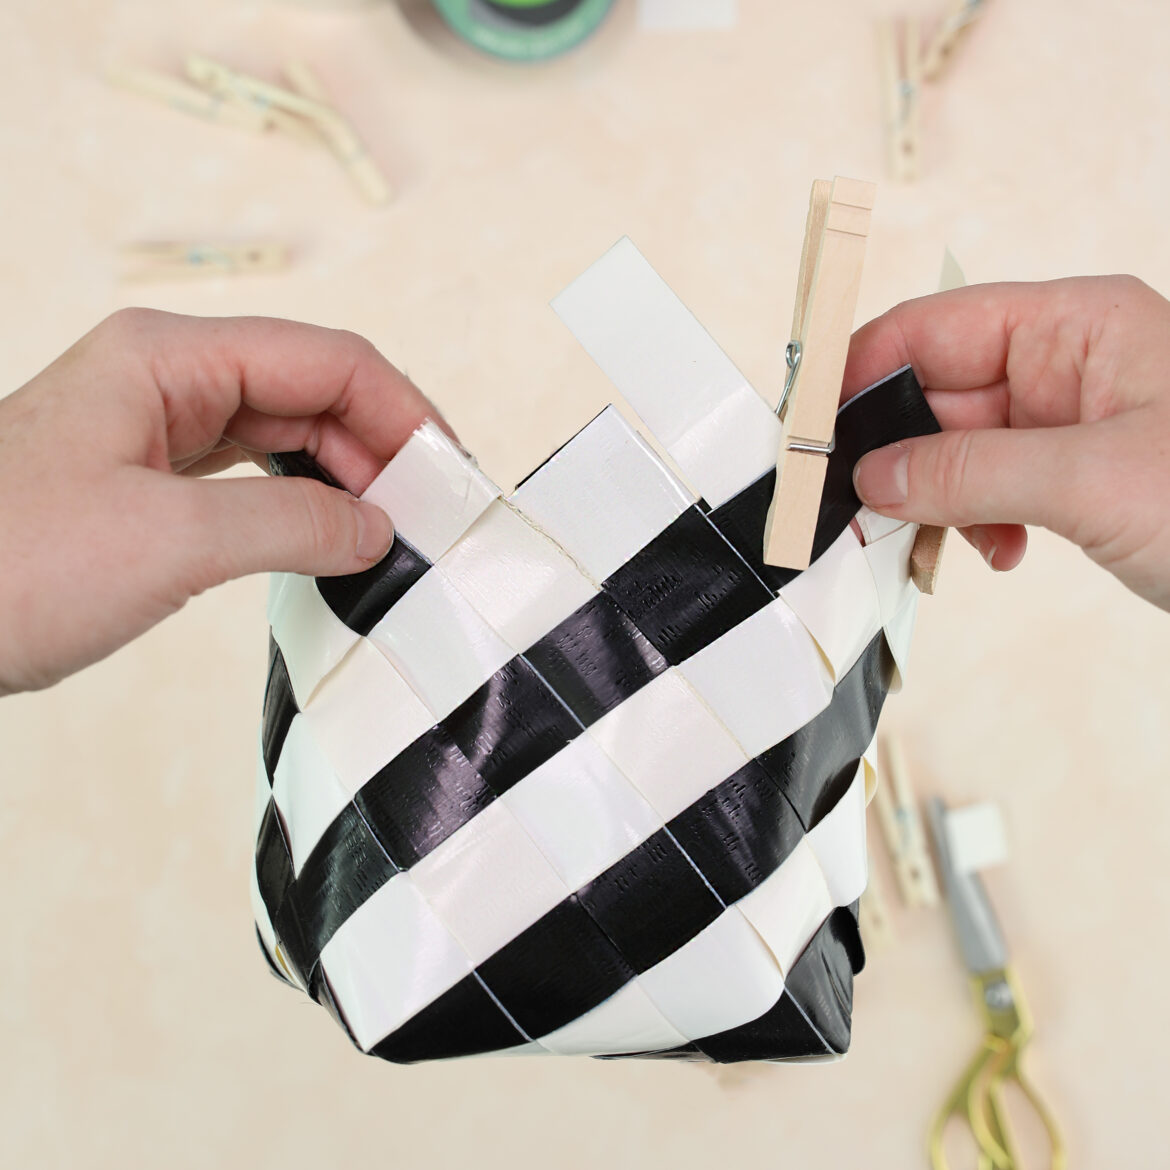
Once you've woven to the top of the basket, find the shortest pieces and they will determine the height of the overall basket. Fold the overlapping pieces together to make a point, trim away any excess and secure with a piece of crystal clear invisible tape.
Step 8
Remove the paper craft tape from inside and your basket is finished!
